Tag Archives: Smocking

A Few More January 2024 “Makes”

As I attempt to do a better job at sharing my sewing journey with everyone, I realized that I haven’t shown all of my January “makes”. In our frigid weather, I managed to get one outfit completed each week!!! I’m sure that pace won’t hold up for all of 2024. LOL!

The second make of the year was another dress that I was working on to go along with our SAGA Dogwood “Slow-Along”. It was another one that didn’t get saved for demo purposes – I just couldn’t save it that long. I ended up finishing it and loved how it turned out!

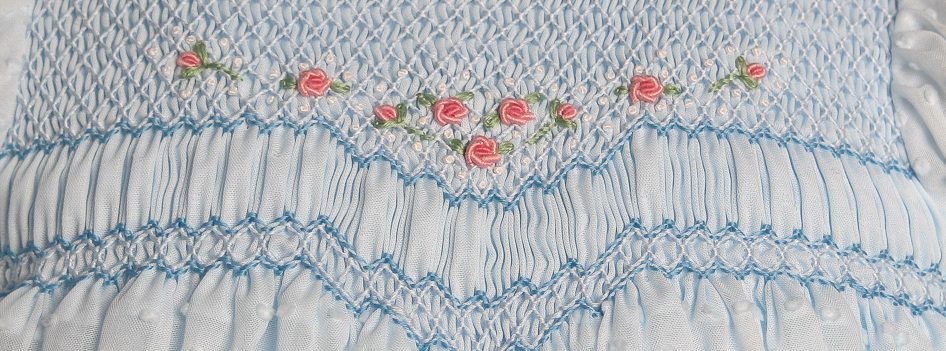
For this dress, I used my Betsy pattern. It is a vintage reproduction and a style that I love. I had some mother of pearl blue buttons that I used on the front of the dress – so sweet!!! I love this style with the pleats in the front and smocking in the front & back. I made up an original smocking design for this dress.

My 3rd make of the year was the dress version of my newest pattern – Vintage T-Romper and Dress. This turned out as sweet as I thought it would!

I think that this would be the sweetest dress for beach pictures!!! Of course, it is just as sweet when it is made from casual fabrics. I’ve made the romper version of the pattern in both heirloom styles as well as casual. Of course, I love the heirloom versions!!!

I love that the romper is a unisex one and equally cute either way!

My 4th make of the year was a dress that I’ll be sending off to the Appalachian kids ministry (Putting Prayers To Action). I love being able to sew and support this ministry!!! After completing the dress, I add undies, socks, PJ’s and a blouse to go with the dress. This ministry supports the most vulnerable families with clothing, toiletries, food and more. If you don’t sew but would like to participate, go to the webpage – they have a link with all of the current needs as well as a way to donate funds.

In addition to getting these dresses sewn, I also finished up a handbook for sewing a smocked yoke dress. This handbook is to be used in conjunction with any yoke dress, shirt or romper. It covers every aspect of constructing the garment – planning, pleating, smocking as well as avoiding all the pitfalls of collar construction, modifying vintage pattern styles, showing lots of sleeve & hem options.

If you’ve struggled with constructing a yoke dress, this may be a great option for you!

Needless to say, January was a very productive month! I do hope to enjoy creating many more patterns in the coming months. Sometimes this process goes quickly, but most of the time it takes LOTS of time. I hope you’ve enjoyed some stitching time already this year!!!
Happy New Year!

Today marks the beginning of another new year – new adventures to take, new skills to learn, new friends to make, etc. I hope and pray that the new year will bring health, contentment & joy to each of you!

I am not one to make new year resolutions. That said, I will keep my thoughts for the new year to be sewing related. I like to look back at the previous year to see what I accomplished and then look forward to this new year and see what I want to accomplish. My goals for that tend to be very similar from year to year. I want to keep learning new techniques, new stitches and try new patterns. I also plan to continue to put new patterns in my Etsy shop as I can get them finished. I enjoy designing the patterns and I continue to learn and improve my illustration skills so that the patterns as well as the illustrations are the best that I can do.

Our SAGA guild is doing a “Yoke Dress Slow-Along”. In February I will be doing a segment on collars, so I’ve been working on a few samples that I can use as demonstration examples. Wouldn’t you know that I ended up with a problem!!! I made a mistake. Rather than fretting about the mistake, I considered it a design opportunity.

Yesterday I worked on embroidering collars for this project. In spite of the fact that I had clearly marked the center front, I somehow ended up marking the placement dots for the flowers on the collar backs. Ugh! It wasn’t until I had the 4th of 6 flowers completed that I discovered my mistake. My first thought was that I would complete the group of 3 flowers on the back and then do them on the collar fronts (where they should have been in the first place!) and that the dress would look pretty both coming and going. However, I still felt that this might look like a corrected mistake – which it was. Then I had the brilliant idea to add a group of 3 flowers to the center of the collar and voila – now it is a design element and not a mistake! Excuse the unpressed collar – it is still drying from when I soaked out the blue wash-out marker.

I’m going to count this as my first new year success – I didn’t have to un-stitch anything and I like the new design even more than just having 3 flowers at the collar front! I often find that a mistake can result in some creative thinking and then end up being something that I wouldn’t have considered but end up liking a lot! I am going to have to hold myself back from finishing up this dress – I need to save it for February!

Easter comes early this year, so if you will be making pretty Easter dresses, it’s time to start on those!!! I hope you might consider some of my favorite patterns from my Etsy shop. Here’s a few of them that are favorites:

First up is an all time favorite of mine – Ella’s Easter dress. I designed and made this for our first granddaughter and this is her wearing it 13 years ago. I still love it!

Next up is Juliette – a lovely dress with lace bodice & sleeves – so perfect for Easter, portraits, weddings, etc. I made this version with ecru val laces for Livvy (above) and with pink embroidered Swiss trims for Eva (below).

Suzette is another favorite of mine that I made for all 3 girls one easter – this is one of my favorite Easter pictures!

The last inspiration I’ll leave you with today is Gwenyth. I loved making this dress. Ella wore this for her baptism, which makes it extra special to me!

I hope that this new year will be a time for you to learn some new things – sewing, embroidering, smocking, etc. As always, keep on stitching!!!

Kathy

Perfectly Pretty Smocked Peasant Top & Dress

IMG_7629

This was first posted in 2014. I’m updating the post today. 😊

IMG_7653
IMG_7656

This is my “Perfectly Pretty” top on my sweet granddaughter when she was 2 years old.  It was featured in Sew Beautiful magazine in 2013 and I was thrilled to see that it made the cover photo of Issue #149.

sew149cov6

Since then, I’ve added sizes as well as improved the directions and now offer this top/dress in my Etsy shop in sizes 12 mo. – 10. I’ve made this top so many times and it’s always been a hit. While I realize that we are currently heading into cooler weather, it’s a great pattern to whip up for those holiday vacations to warm destinations as well as for future warm weather!

As you can see, it makes a great summer dress as well! Nice and cool for those warm days! It’s cute on both big girls as well as little ones! Excuse the bad picture!!!

It also makes a wonderful top to accompany shorts or bloomers as well.

As you can see, the Perfectly Pretty pattern has lots of possibilities!

Leaving you with a picture that will make you smile! Happy stitching!

Kathy

Technology (I-Pad) And Smocking

I thought that this post was definitely worth reviving since I still am a fan of using my iPad for smocking!

First, let me preface that I am a far cry from being a technological wizard. LOL!  This statement alone will send my husband into hysterical laughter!  So for those that are technologically advanced or under the age of 40, this post isn’t for you unless you just want a good laugh, which I’m happy to provide. However, for the old mature ladies that may also suffer from technological challenges as well as poor vision, you’ll want to keep reading!  I am sure that I have at least one mature smocker on the edge of her seat at this moment!!!  (well, in my imagination I do anyway!)

My eyesight has never been good, and as I’ve become a woman of a certain age, my eyesight has diminished as well. This isn’t a good thing when it comes to smocking and embroidery. You do actually need to “see” what you’re doing to be successful at it.  I do use magnification when stitching, and that is so helpful, but I needed even more help than that! This is where my iPad comes in.

My husband is always helping me and looking for ways to make it easier for me to do the things that I enjoy – particularly smocking. I was thrilled to learn that I could enlarge (to ginormous proportions!) my smocking designs.  He has the iPad set up so that I can access all my documents – therefore, all the smocking designs that I’ve designed. (I know many of you are so smart and already know this stuff, but I needed his help!)  Not only do I have access to my smocking designs, but I also have access to all the free designs that can be downloaded from the internet as well as the PDF smocking designs available for purchase.

Prior to Christmas, I purchased Janet Gilbert’s Elf design and smocked it on a dress for my granddaughter. My husband observed me trying to do the balancing act with my iPad perilously perched on the arm of my easy chair while smocking the insert for the dress. No easy task!  He immediately researched and purchased an iPad stand.  He gave it to me for Christmas!  Oh – how sweet it is!!!  I’ve used this several times already!

IMG_9213

My armchair isn’t pictured – I had to resort to a chair that I could carry into the photography room as I’m not a photographer either! Observe how fabulous this device is – I can adjust it to any level and get it as close to my eyes as needed! As easily portable as it is, I can pack it up and take it on vacation with me as well. This was a win!!!

IMG_9219

This stand is stable, can be adjusted and/or rotated. The upper portion of the stand is flexible, so can be bent to just the right place. You could also use this standing up if you wanted to use it as a music stand. While there are lighter weight and cheaper versions available, I like the sturdiness of this stand. What a fabulous addition to my smocking “tools”.  The iPad stays securely attached.

In case you haven’t noticed, I have that smocking design zoomed in to gigantic so that every stitch is easily seen!!!  You can do this!

IMG_9216

In case you’re interested, the smocking design is one of mine that was featured in Sew Beautiful magazine (July 2011) and is a free download on their website. Perfect for your summer smocking!

My latest smocking project using my iPad and stand has been a baptism outfit for our new grandson. I downloaded the free cross design from Michié.  She has generously shared so many free designs on her blog – you definitely want to check it out. I zoomed in on that one and finished up his outfit. It is so sweet and he’ll be wearing it in a few weeks when he is baptized.

IMG_9124

Even more recently, I have discovered that I can use my iPad as a light-box of sorts to trace embroidery designs. In order to do this, I first had to adjust the brightness on my iPad. Go to the iPad settings, find the brightness and adjust it there.

Ipad brightness adjust

After adjusting the brightness as bright as it will go, I pulled up the embroidery design that I wanted to trace.  It is just a bit tricky as  you must have one hand on the screen to hold it in place (keep it from moving around) while you’re tracing. But, with sheer fabrics and a size embroidery design that fits the screen of the iPad, this works pretty well.

IMG_9220

I hope that this has helped at least one of my sewing friends – after all, we all want to be able to enjoy the fine art of embroidery and smocking as long as we have eyes to see and hands that can still stitch!

This post was written in 2015. Since that time, I have found other uses for the IPad. Post surgery, it was wonderful to be able to enjoy watching movies while laying in bed. It is also a great way to read a book using the kindle feature if your hands tire while holding the IPad. I prefer reading all my kindle books on the IPad due to the larger font. Isn’t technology great!

So, with that, this technological non-wizard will sign off and get back to some sewing and smocking!

Happy stitching……

Kathy

Annalise Top

This is a repost from 2014! My, the time has flown by!!! My little princess has her 11th birthday today!!!

I did have the opportunity to stitch out an adorable Snow Princess on one of my Annalise tops.  I am thrilled with it and the little princess that will wear it immediately recognized it.

IMG_8883

Update – Janet’s website is no longer available.

Fortunately I had some sparkly rick rack in my stash in both pink as well as white.  I couldn’t decide on which one to use, so I used them both!  Because the points were the same distance apart and only the height of the peaks were different, I was able to use them together and the end result was not only interesting, but I think that it goes well with the snow theme.

IMG_8887

This went along so well with the snowflakes in the smocking – which I added one strand of silver metallic thread for sparkle effect. As you can see, the little princess O is adorable in her top!!!

The Annalise top is one of my newest SAGA approved classes.  The top for the class is done in vibrant colors and has a cap sleeve. The pattern is also available in my Etsy shop with 3 different sleeve variations – angel sleeve, short sleeve & 3/4 length sleeves! It comes in sizes 6 mo. – 8.

IMG_8608
IMG_8874

The original pattern was called Temily and was in Australian Smocking and Embroidery magazine #80 several years ago. The original pattern had a 3/4 length sleeve which is perfect for our mild winters in the south. The Etsy pattern has all the sleeve variations!

fft3

I have smocked this top with the different sleeve options so many times and in so many sizes now that I have lost count.  Each one seems to be my new favorite!  It is quick to smock, easy to wear and a little more trendy.  Both kids and moms seem to love it.  I am thrilled to be able to offer the wider range of sizes in the pattern teaching kits.

I’ll share some of the cute versions that I’ve created over the past several years.  I cannot chose a favorite – they are all favorites!

In the 2 samples below I added some width to the sleeves which made them fuller but allowed for a smocked ruffle at the hem. This isn’t included in the pattern, but it easy to adapt.

smocked valentine 2
Sweet Pea temily

OK – I have to stop!  As you can see, this is really one of my favorite tops and with the sleeve variations can be worn all year long.  Different trims, smocking designs and themes allow this top to have unlimited creativity but still be a quick project.  I hope that this will encourage some young moms to learn this fine art of smocking!

Happy Stitching!

Kathy

Changing A Bishop Sleeve

This is re-post of a past blog post, with a few additional comments.

Because styles vary from year to year, I wanted to change up the sleeve of the bishop dress so that it was a bit more contemporary. I redrafted the sleeve to the bishop dress pattern from the bishop pattern that I normally use and put the dress together so that I could smock it while on vacation.  I always make my bishop dresses as ready-to-smock. Instructions on how to do that are available in my Etsy shop (kathysheirloomshop). I love having a completed dress when the smocking is finished.  I was very happy with the end results!

IMG_8761

Smocking on prints is always challenging for me, and this was no exception.  I took along several different colors of floss as well as several different smocking plates.  In the end, I decided to use Creative Keepsake’s “Mackenzie” design.  It is similar to the Children’s Corner “Firelight”, which I’ve always loved on prints and plaid fabrics.  I think that the use of the 2 colors is very subtle and compliments the print nicely.

IMG_8762

The micro check gingham for the bias at the neck and sleeves adds a little brightness to the fall-ish print.  The micro check was also used for covered buttons in the back.

Now, for a few details on how  the sleeves were redrafted.  You’ll notice that they are not smocked.  I wanted less full sleeves, so smocking them wasn’t practical as that would require more fullness than I wanted.  To reduce the fullness in the sleeves, I creased the sleeve in several places and put some 1/4″ tucks at the creases and pinned them down as  seen on the furthest tuck on the right.  After I felt that enough fullness was removed, the new sleeve was redrawn with the top edge drawn as a smooth line from one side to the other.

IMG_8765

The next thing to do was to reduce the depth under the arm.  The finished sleeve depth under the arm is about 1/2″.  Then, the final step was to raise the lower edge of the sleeve by drawing a curve (an upside down “U” shape) from one side seam to the other.  I didn’t have a particular formula for this, just an educated guess.  This is the new sleeve.

IMG_8766

After the new sleeve was created, the dress front, sleeves and back were sewn and the bishop dress pleated as normal.  However, when the bias band was attached to the dress, the pleats in the front and back of the dress were kept tightly together while the sleeve pleats were spread out. At this point, the pleating threads could be removed from the sleeves and the dress front and back tied off as needed.  The short sleeves were gathered at the bottom and bias band was attached.  The bias band for the sleeves was adjusted and made slightly longer (measure your child for accurate measurement) since the different shaped opening requires a little more room than the normal smocked sleeve.  The remainder of the dress was constructed.

This was a fun dress to make and turned out so cute and was a big hit!!!

If this is something that you want to try, don’t be afraid to experiment!

Happy stitching!

Kathy

Lots of Stitching

I don’t know where the time has gone!!! I continue to stay busy sewing as well as creating new patterns. I’ve also been busy making lots of new Wee Care gown samples that I will use as samples in an upcoming workshop.

Since my last post, I’ve added 2 new patterns to my Etsy shop. The first one I just adore for summertime! It makes a gorgeous outfit for beach pictures, weddings, etc. It is perfect for the little ones, boy or girl, as well as older girls.

For little ones, bloomers can be used instead of a skirt, however, I loved the idea of creating both the bloomers as well as the skirt for a little girl!

What a great way to have options!!! The pattern is called Button-on Bib, Bloomers & Sundress.

The most recent pattern is my City Frock Dress/Tunic pattern. This is another fabulous pattern for summer sewing! Of course, it’s also suitable for cooler weather with a blouse or t-shirt underneath.

All the girls were a big fan of the large pockets! I had fun making these dresses & tunics!

Of course, I continue to make my Wee Care sets for Caleb Ministry. I have completed quite a few that I’ll be using as samples for an upcoming workshop. I did a variety of different hem treatments for the gowns.

The beautiful crocheted edging on this blanket and the next one was done by another friend, Maribeth, and sent to me. It almost makes me want to learn to crochet again!

Traveling up to Michigan to visit with my parents gave me plenty of time to get the gowns smocked! It’s a really long drive! I made sure that I had several gowns ready to smock before the trip!

For the boy gowns, I added a pleated sleeve version that I’m particularly fond of. Several years ago, another smocking friend of mine, Beth, made a gown with a pleated sleeve. She generously shared the instructions with our local guild. As the years progressed, I worked with the new Wee Care chair for the guild and we tweaked the instructions a bit more to end up with a sleeve that I do like for all the various sizes from the under 1 lb. size to a NB size. I have had requests for these instructions, so I’m adding them here for you to download. All the sizes are included in the PDF file.

I hope that these will be helpful to others that make these special gowns. I wish they weren’t needed, but if they can provide one less thing for bereaved parents to worry about, I’ll continue to make them.

I hope you’re having a fabulous spring, stitching beautiful things and getting ready for the summer months!!! Keep on stitching!!!

Kathy

Happy New Year – a gift for you

I’ve sadly neglected my blog. That said, I have been busy sewing, designing and such. I hope to do a better job posting in this year to come. 😊

Today I was contacted by someone that was going to make my Annalise top and she wanted to find the heart design that she had seen somewhere – probably Pinterest. It turns out that this was something that I designed MANY years ago when I used to make and sell custom garments on Ebay.

I designed the heart smocking to match the fabric on the pants, which was a crooked heart. Isn’t she the cutest model!!! I’m sure that she’s in college by now!

I had to do a bit of hunting to find the design. Thankfully I had saved the pencil graph of the heart. With that, as well as the pictures to go on, I graphed out the heart design on the computer and wanted to offer it to my followers so that it can be smocked on a Valentine outfit for this year!!! I have graphed out the smocking design that fits perfectly on the Annalise top (available in my Etsy shop – just click on the name and it will bring you there) as well as offering it in a regular yoke design.

This is a relatively simple smocking design and suitable for someone that has mastered reading the picture smocking graphs

I

hope that you will enjoy making a cute outfit using one of these smocking designs! The single design is perfect for a small area to smock while the expanded version will work well on any yoke dress!

May God bless you and keep you in this New Year! Happy stitching!!!

Kathy

Wee Care Gown Sew-Along

I’m going to do a SAGA Wee Care gown sew-along for all those that wish to participate. The Wee Care gowns are the tiny bishop gowns used at the hospitals as infant demise gowns. It’s a beautiful expression of love and caring for the precious little ones that don’t make it and the families are so appreciative. I make so many of these each year, and I thought it would be a nice way to share some of my tips and techniques.

I will be sharing how I put together this gown. I use the SAGA Wee Care gown pattern by Nancy Newell and I cut the gown out using the NO side seam method.

Download and print your pattern, gather your supplies and be sure to watch the YouTube video.

I’m providing links to the supplies that I use and recommend, though feel free to substitute if you have different preferences. Just click on the blue words and it will take you to the website.

Gingher Pocket (Kindergarten) Scissors

Mettler 60 wt. thread

Madeira Cotona or Aurafil 80 wt. thread

Point Pusher with Ball End

Imperial Batiste

Schmetz 70 Microtex Needle

Schmetz 110 Jeans Needle

Schmetz Double Hemstitch Needle

Long Tweezers

Sulky Fabri-Solvy

Water Soluble thread

I will be sharing videos of how to insert the sleeves, sew the bias band on as well as how to create an easy Madeira hem – with or without hemstitching. I particularly like this hem treatment to embellish a boy’s gown. Of course, the same techniques can be used on another project – Easter dresses, tea towels, quilts, etc. Lots of options! So, even if you aren’t creating a Wee Care gown, learn the technique and use it elsewhere. Of course, the tiny gowns are a great way to practice and perfect different techniques while blessing a family.

Join the fun and enjoy the process! Hopefully you’ll learn something new or different!

Keep on stitching!

Kathy

Disclosure: The recommended products contain affiliate links. If you purchase something through one of those links I may receive a small commission, so thank you for supporting me when you shop! These are my opinions and are not representative of the companies that create these products. These are the products I use and have gotten great results with. I would never recommend poor quality products.