Monthly Archives: February 2024

Buttons, Buttons, Buttons…..

Let’s talk about buttons today. Buttons can make or break a garment! There are beautiful buttons available and while they can enhance your garment, if executed incorrectly, they can wreak havoc on an otherwise wonderful garment – both on a front buttoning or back buttoning garment. Today we’ll talk about the blouse, but the same rules hold true for a dress that would button in the back.

A pattern will always include the size of the button required for the garment. But what happens when the button of choice is a different size than what the pattern calls for? Often times the button is chosen after the garment has been sewn and you wish to use what is on hand or you’re shopping for the perfect button and it is a different size? It’s not OK to use a different size button or the finished garment will not look balanced. It is ALWAYS best to choose your button prior to starting on your garment!

The button size is ALWAYS the same as the lap on the blouse.

When the blouse is buttoned, the center fronts should sit exactly on top of each other. For illustration purposes, the underneath part of the blouse is shown raised, but on the finished blouse, the neckline will be aligned.

The button is sewn to the center front of the blouse. In general, the buttonhole size is the size of the button (in this case, 1/2″) + 1/8″ (the depth of the button). For this example, that would require a 5/8″ buttonhole. If a particularly thick button will be used, then the buttonhole would need to be longer.

Going forward, the diagrams show the finished blouse edges, not the cutting lines. Make adjustments to the finished edges and then add the seam allowance.

The buttonhole placement is important as well. The buttonhole ends 1/8″ away from the center front. It is also positioned 1/2″ below the finished neckline (width of the button, shown in the first diagram). When executed properly, the amount of the blouse showing both above the button as well as from the edge of the button to the edge/fold of the blouse will be the radius (half the width/diameter) of the button. With this example, that would be 1/4″.

If a different size button will be used, then the lap needs to be adjusted BEFORE you begin cutting out and sewing the garment. So, if a 5/8″ button will be used, then then lap will need to be 5/8″ from center front to the edge (whether foldline or seamline) of the blouse. Do this by drawing a line in 1/8″ away from the center front (shown in red). Adjust the neckline as well. This will be the new pattern piece for the blouse. A 3/4″ buttonhole (5/8″ + 1/8″ – buttonhole depth) would be needed. It will still end 1/8″ away from the center front.

The button and buttonhole placement will need to be adjusted from placement on the original pattern in order to accomodate the 5/8″ size button.

Using a different size button than the size that was intended will result in poor results and will not look balanced on the finished blouse, as shown below. The button ends too close to the edge of the blouse front.

Don’t be afraid to use a different size button than what the pattern calls for, just remember to adjust the pattern prior to cutting and sewing and you’ll be much happier with the results! Have fun with some designer buttons!!!

Happy stitching!
A Few More January 2024 “Makes”

As I attempt to do a better job at sharing my sewing journey with everyone, I realized that I haven’t shown all of my January “makes”. In our frigid weather, I managed to get one outfit completed each week!!! I’m sure that pace won’t hold up for all of 2024. LOL!

The second make of the year was another dress that I was working on to go along with our SAGA Dogwood “Slow-Along”. It was another one that didn’t get saved for demo purposes – I just couldn’t save it that long. I ended up finishing it and loved how it turned out!

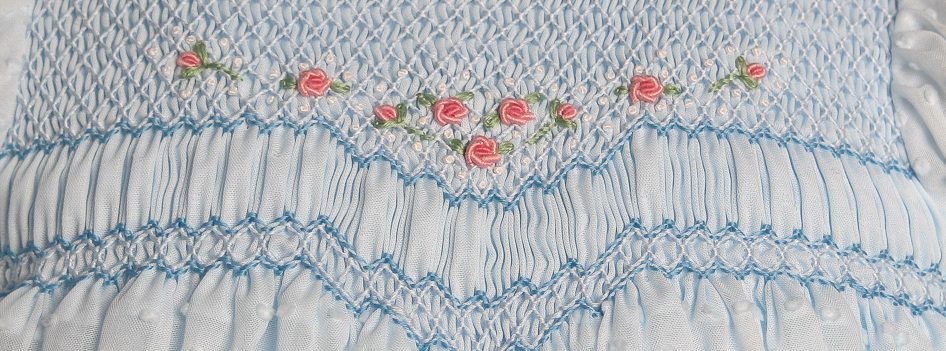
For this dress, I used my Betsy pattern. It is a vintage reproduction and a style that I love. I had some mother of pearl blue buttons that I used on the front of the dress – so sweet!!! I love this style with the pleats in the front and smocking in the front & back. I made up an original smocking design for this dress.

My 3rd make of the year was the dress version of my newest pattern – Vintage T-Romper and Dress. This turned out as sweet as I thought it would!

I think that this would be the sweetest dress for beach pictures!!! Of course, it is just as sweet when it is made from casual fabrics. I’ve made the romper version of the pattern in both heirloom styles as well as casual. Of course, I love the heirloom versions!!!

I love that the romper is a unisex one and equally cute either way!

My 4th make of the year was a dress that I’ll be sending off to the Appalachian kids ministry (Putting Prayers To Action). I love being able to sew and support this ministry!!! After completing the dress, I add undies, socks, PJ’s and a blouse to go with the dress. This ministry supports the most vulnerable families with clothing, toiletries, food and more. If you don’t sew but would like to participate, go to the webpage – they have a link with all of the current needs as well as a way to donate funds.

In addition to getting these dresses sewn, I also finished up a handbook for sewing a smocked yoke dress. This handbook is to be used in conjunction with any yoke dress, shirt or romper. It covers every aspect of constructing the garment – planning, pleating, smocking as well as avoiding all the pitfalls of collar construction, modifying vintage pattern styles, showing lots of sleeve & hem options.

If you’ve struggled with constructing a yoke dress, this may be a great option for you!

Needless to say, January was a very productive month! I do hope to enjoy creating many more patterns in the coming months. Sometimes this process goes quickly, but most of the time it takes LOTS of time. I hope you’ve enjoyed some stitching time already this year!!!

PDF Pattern Tutorial

As a seller of PDF patterns, I constantly get messages from buyers that have “problems”, most frequently with their downloads. Fortunately, the problems aren’t problems with the pattern or download, but rather problems that the buyer is experiencing due to being new to PDF patterns and not fully understanding how to use them. Because of this, I’ve created a PDF pattern tutorial/guide that I hope will be helpful to those that are newer to PDF patterns.

In this tutorial (you can download by clicking on the “download” box), I cover the process of buying on Etsy, downloading the pattern, printing the pattern & assembly of the pattern. It is complete with pictures for those that, like me, are visual learners. It is my hope that those new to PDF patterns will use this reference as a guide to make their PDF pattern experience a good one so that they can use them with confidence.

I’ve also included a short description of how the Etsy platform regards the reviews that buyers leave. It’s not quite as favorable as you might think.

Please let me know if you have any suggestions to improve my tutorial! Happy stitching!!!